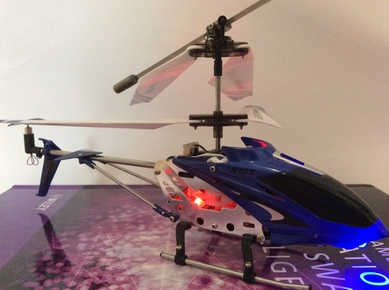
Some time ago I saw people reverse engineering the infrared protocol of the Syma S107G toy helicopter and I wanted to get my hands on it as well. It is a coaxial helicopter, which means that it doesn't require a torque cancelling tail rotor. Yaw is controlled by using the speed difference to a second rotor underneath the main rotor, which spins in the opposite direction. It's really astonishing what good quality you get for just 20 bucks. It crashed quite often and it still flies like new.

After analyzing the infrared data transfer with my oscilloscope attached to the infrared LED, I wanted to check the timings and found some really interesting websites, where people described their findings and I was able to improve my understanding of the protocol.
Parts needed
- Syma S107G
- Arduino
- IR LED 940nm
- BC 548 Transistor
- 10Ω and 220Ω resistors
Previous Work
The journey began in 2012 when Mike Kohn brought up a circuit to jam the infrared signal in the office to declare no-fly zones. After this, Mike Field had problems analyzing the signal using an IR receiver and took on using a logic analyzer. Kerry Wong later used a photo diode to analyze the data stream with an oscilloscope and confirmed some previous findings.
All of them confirmed that the data is transferred using a 32 bit sequence, modulated on a 38kHz (about 13 microseconds high, 13 microseconds high) carrier frequency. Jim Hung took it even further, analyzed the protocol with a logic analyzer as well and was able to correct some timings and found out, how to use the second channel. Besides some software he published, he also wrote some specs.
Hacking forward
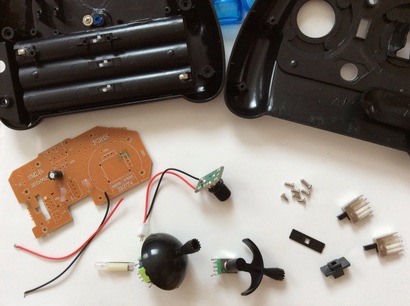
My own measures were not too bad and I was able to fly already. After researching the already mentioned previous works, I corrected the timings - even if it wasn't necessary, since the receiver is quite robust. At the beginning, I used one 5V IR LED, with which I was able to fly only about 50cm. The original remote control used 3 9V LED's, so I decided to rip it apart and build a new remote control.

If you don't want to take this step, you need to buy 940nm 9V IR LED's, that's actually all I needed from it. After that you can build a circuit like on this schematic, using a transistor (BC 548C) connected to Arduino pin 3 and some resistors:

Protocol
Even if it was documented quite often already, I compiled a little overview when I implemented the protocol myself. The sequence looks as follows:
Overview:
HH 0YYYYYYY 0PPPPPPP CTTTTTTT 0AAAAAAA F
  Y - Yaw 0-127, (0=left, 63=center, 127=right)
  P - Pitch 0-127, (0=backwards, 63=hold, 127=forward)
  T - Throttle 0-127, (63=50%, 127=100%)

Timings:
HH - Header:
  2ms HIGH
  2ms LOW
32 bit Command:
  "0": 0.3ms HIGH, 0.3ms LOW
  "1": 0.3ms HIGH, 0.7ms LOW
F - Footer:
  0.3ms HIGH
Software
Most of the software that is around for a while works just fine. However, what I found was not really optimized or reusable. So I spend some time coming up with a really small and optimized routine. It's so small, it doesn't even need a cross-reference and can be posted right here. Everything that is needed is this little function now:
void sendSyma107G(IRsend ir, uint8_t yaw, uint8_t pitch, uint8_t throttle, uint8_t trim, uint8_t channel) {

  ir.enableIROut(38);

  ir.mark(2000);
  ir.space(2000);

  uint8_t data[4];
  data[3] = yaw;
  data[2] = pitch;
  data[1] = throttle | (channel << 7);
  data[0] = trim;

  for (int8_t i = 31; i >= 0; i--) {

    ir.mark(300);

    if ((data[i / 8] >> (i % 8)) % 2) {
      ir.space(700);
    } else {
      ir.space(300);
    }
  }
}
In order to make it working in Arduino, a proper setup() routine is needed. Additionally, I use the IRremote library, which can be installed via the Arduino Library Manager.
#include <IRremote.h>

IRsend irsend;
uint8_t Throttle = 0; // 0-127
uint8_t Yaw = 63; // 0-127, center=63
uint8_t Pitch = 63; // 0-127, center=63
uint8_t Trim = 63; // 0-127, center=63
uint8_t state = 0;

void setup() {

    Serial.begin(19200);
}
If you want to control two helicopters, simply add another sendCommand line with channel set to 1. I previously published the node game controller library. To fly the helicopter with a Playstation 2 controller, I send a simple data stream via the serial interface to the Arduino like so:
void loop() {

  if (Serial.available() > 0) {

    uint8_t r = (uint8_t) Serial.read();

    switch (state) {
      case 0: if (r == 0xFE) state++; break;
      case 1: if (r == 0xAB) state++; break;
      case 2: Throttle = r; state++; break;
      case 3: Yaw = r; state++; break;
      case 4: Pitch = r; state++; break;
      case 5: Trim = r; state = 0; break;
    }
  }
  sendSyma107G(irsend, Yaw, Pitch, Throttle, Trim, 0);
  delay(20);
}
And on the computer connected to the Arduino in JavaScript:
const Gamecontroller = require("gamecontroller");
const ctrl = new Gamecontroller("ps2");

const clamp = (x, a, b) => Math.max(Math.min(x, b), a);

ctrl.connect();

const SerialPort = require("serialport");
const serialPort = new SerialPort("/dev/cu.usbserial-A702YPTD", {
  baudRate: 19200,
  autoOpen: false
});

const state = [
  0xFE,
  0xAB,
  0, // Throttle
  63, // Yaw
  63, // Pitch
  63 // Trim
];

serialPort.open(function(err) {
  if (err) {
    console.log(err);
    return;
  }

  ctrl.on("data", function(data) {

    state[2] = clamp(state[2] + (128 - data['axis:JOYL:Y']) / 100, 0, 127);
    state[3] = clamp(127 - data['axis:JOYR:X'] / 2, 0, 127);
    state[4] = clamp((data['axis:JOYR:Y'] - 2) / 2, 0, 127);

    serialPort.write(Buffer.from(state));
  });
});
The source can also be found on Github in my Fritzing collection.