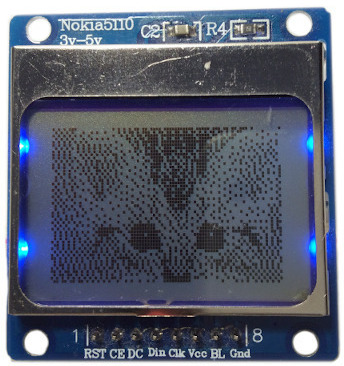
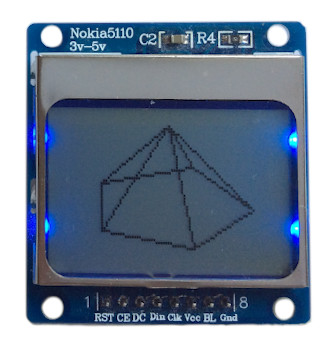
Before the Seneca-effect took down Nokia, it was a big mobile phone manufacturer with hardware that still works today. This allows us to repurpose these old components for our toy projects. One part that gained great popularity in the Arduino community is the 1.5" graphical display of the Nokia 5110 and later Nokia 3310 as it is inexpensive and easy to work with. The monochrome LCD display with only 84x48 pixels can be used for text and graphics, which are still very readable dispite its size.

Components
To operate the display the following components are needed:
- Arduino
- Nokia 5110 Display
- Optional 74HC4050 Level Shifter
- 10k Resistors
- Optional 1K Potentiometer
Philips PCD8544 Controller
The Nokia display uses the Philips PCD8544 display controller, which allows accessing the raw pixel data through a more convenient synchronous serial interface similar to SPI that only requires 3 to 5 digital I/O pins, depending on whether you want to control the chip select and reset lines manually. A few commands the embedded PCD8544 is capable of are
- Power up/down
- Image inversion
- Horizontal / Vertical adressing
- Set contrast, bias, temperature coeficient
- Set memory coordinates
Display Pinout
There are clock (SCLK) and data (DIN) input lines, as well as an active-low chip select (SCE) input. Additionally the D/C input tells the controller whether it's receiving a command (low) or displayable data (high). Here is a full overview of the pinout:
| Pin | Label | Description |
|---|---|---|
| 1 | RST | Reset (active low, set high for reset) |
| 2 | SCE (CE, CS) | Chip Enable (active low) |
| 3 | D/C | Chip Enable (active low) |
| 4 | DIN (DN, MOSI) | Serial Data input |
| 5 | SCLK (CLK) | Serial Clock input |
| 6 | VCC | 2.7-3.3V power supply |
| 7 | BL (LIGHT, LED) | Background light (max 3.3V) |
| 8 | GND | Ground |
Please note: I bought several displays from Sparkfun, Adafruit and Aliexpress, which shows that the pinout configurations of the breakout board is not consistent and you MUST wire the display by pin label and not just by order. The following is an incomplete list of possible pin layouts I have seen in the wild:

Wiring
The display is designed to run at 3.3V and have 3V communication levels, so for 5V microcontrollers like Arduino a logic level shifter or similar is required to not damage the device. If you are running a 3.3V microcontroller like the Arduino Pro, you can skip the limiting resistors or the level shifter.
For the data transmission pins SCLK and DIN arbitrary digital pins can be used - here D3 and D4. To achieve a faster data transfer, the Arduino Uno hardware SPI pins D11 and D13 could be used instead.
The reset RST, chip enable SCE, and data/command D/C pins can be connected to any digital I/O pin, here D7, D6 and D5 are used.
The background LEDs should be limited with a 330Ω resistor or a poti so that the backlight can be dimmed. The backlight used 4 white LEDs with 20mA each, so take an additional draw of 80mA into account, but without the limiting resistor the LEDs draw much more.
Limiting Resistors
The cheapest and easiest way to run the display in a 5V environment is protecting the digital pins with in-line limiting resistors, since the I/O pins are supposed to be 5V tolerant. In this way the signal wires are not connected directly to the display, but with resistors in between: 10kΩ resistors for the RST, D/C, DIN, and SCLK pins as well as a 1kΩ resistor between the SCE pin. Either you use a 1K potentiometer or a 330Ω resistor for the backlight LED:

Level Shifter
The 4050 HIGH-to-LOW logic level shifter is probably the best option to switch from 5V to 3V, but the 4050 is hard to find. An alternative is the TXB0104, which however has only four channels.

Software
When the hardware is set up properly, we can install the display driver library and upload the first sketch to the Arduino board.
Installation
Clone the repo directly into your Arduino libraries folder:
cd ~/Documents/Arduino/libraries
git clone https://github.com/infusion/PCD8544
Alternatively download this repo as a zip file and open it from the Sketch > Include Library > Add .ZIP Library... menu inside the Arduino IDE.
Demo 1: Write some Text
The Hello World example can be set up like this:
#include <PCD8544.h>

#include "fonts.h"

PCD8544 display(7, 6, 5, 4, 3);

void setup() {

  display.init();
  display.setFont(YOUR_FONT);
}

void loop() {

  display.clearBuffer();

  display.print("Hello World!", 10, 20);

  display.update();

  delay(50);
}Note: If you can't see anything or only a few pixels faintly, even after you checked your wiring twice, maybe the contrast setting is slightly off for your device, change display.init(); to display.init(60); and play with the contrast value a bit.
Demo 2: Drawing Bitmaps
Drawing images has never been simpler. You can convert any image or photo to a hex array for your 5110 display using the LCD Image Converter Tool.
#include <PCD8544.h>

const PROGMEM uint8_t image[] = { /* insert image data here */ };

PCD8544 display(7, 6, 5, 4, 3);

void setup() {

  display.init();
}

void loop() {

  display.updateImage(image);

  delay(50);
}
Demo 3: Draw geometric elements

Drawing a pyramid using the geometric functions of the driver library is also as simple as:
#include <PCD8544.h>

#define SITES 5

PCD8544 display(7, 6, 5, 4, 3);

void setup() {
  display.init();
}

float rot = 0, px = 0, py = 0;
void loop() {

  display.clearBuffer();

  for (uint8_t i = 0; i <= SITES; i++) {
    float alpha = rot + 2.0 * PI / SITES * i;

    float x = 42 + cos(alpha) * 35;
    float y = 30 + sin(alpha) * 15;

    if (i > 0) {
      display.strokeLine(x, y, px, py, HIGH);
      display.strokeLine(x, y, 42, 0, HIGH);
    }
    px = x;
    py = y;
  }
  rot+= PI / 120.0;
  display.update();
  delay(10);
}
Demo 4: Playing Snake
To play the original Snake on the Nokia 5110 display, we first add four buttons that activate different resistor values on a resistor ladder to the Arduino analog pin A0. Basically this is a simple extension of a Voltage Divider to use only one pin for multiple buttons.

For Snake, it is enough to figure out the resistance of the activated button using the equation derived for the Arduino Ohmmeter or simply read off the raw values when pressing a button:
uint8_t readButtons() {

  uint16_t x = analogRead(A5);

  if (x < 50) return 0;
  if (x < 100) return 1;
  if (x < 512) return 2;
  if (x < 950) return 3;
  return 4;
}